Saturn 4 Ultra Calibration File: A Comprehensive Guide
Find out how to make the Saturn 4 Ultra calibration file work for you and get rid of the inferior 3D printed products. Among other things, it looks at how these are built, what options there are to fix them piece by piece, and brings forth expert advice.
Admin
10/24/20247 min read
Introduction
I have experienced a lot of difficulties in completing the prints. The correct proportioning of the material, or the calibration, is the most important step in the printing process and in most cases, for the Saturn 4 Ultra printer, the calibration file is the key. For those who provide machines like the Saturn 4 Ultra, the calibration file is a very significant step. In this detailed guide, I will be discussing about the Saturn 4 Ultra Calibration File, its necessity, and how to use it properly.
Inconsistent Print Quality
One of the world's printers, the Saturn 4 Ultra, causing hard problems with their print qualities while printing them, is what we always hear. Some of these difficulties can be the following:
80% of the layers with the indifferent distance between them
20% of the products roughness
The most common causes of these are the poor calibration of the machine or the physical damage that makes the problem harder and time-consuming to solve them;.
The Consequences of Poor Calibration
When the Saturn 4 Ultra is not set up correctly, the results can be quite brutal. One is that you are lessening the time it takes to do the work correctly and more consuming of the materials, you need the materials to rebuy because of scrapping and you are maybe shortening the spare parts of the machine which altogether turn into more stress and inertia on you.
15%-150% in longer post-processing time
20-30% higher costs in replacing materials and extra printing
10-15% shorter life of the printer
Emotional states like frustration and demotivation
Without an exact calibration of the system, beginners may possibly have failures in their 3d prints, which may dishearten them and even lead to their giving up their whole projects.
The Importance of the Saturn 4 Ultra Calibration File
The fix of these calibration miseries is only the right use of the Saturn 4 Ultra calibration file. This file is a tool designed for this printer to help tinkerer and hobbyists to use latest technology products. By using the calibration file, you can:
Adapt your printer by subsequently adjusting them
Keep layers in the premature development phase evenly
Get the equal highest print quality in the entire object
Have normal troubleshooting and reprints
The calibration file for the Saturn 4 Ultra thus becomes your mediating tool, which helps you notice and adjust beforehand all the aspects of your model so that the final print reflects them accurately.
Step-By-Step Guide to Using the Saturn 4 Ultra Calibration File
Obtain the Calibration File
First of all, you should succeed in securing the suitable calibration file for your Saturn 4 Ultra. The file can generally be downloaded from the official Elegoo website or it can be obtained from the USB stick which is provided on the delivery of the printer.
Prepare Your Printer
To calibrate the printer, make sure you clean and manage the printer properly. Inspection of any residue or any damage on the build plate and checking if the resin vat is clean and correctly placed.
Load the Calibration File
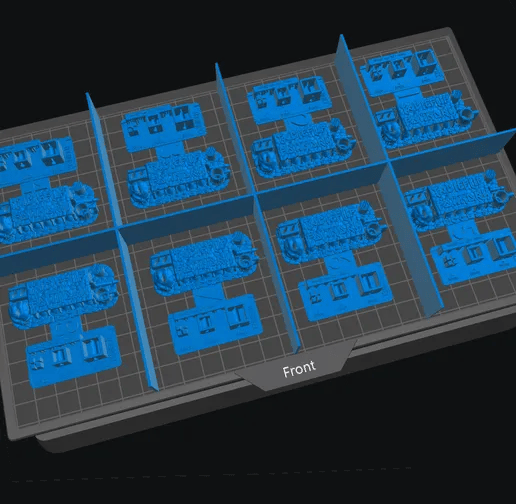
Now open the software you use for slicing such as Chitutbox or Lychee Slicer and load the Saturn 4 Ultra calibration file into it. This file usually contains a series of various types of prints that are produced to check different types of print quality.
Adjust Printer Settings
Read through the recommendations provided along with the calibration file and try to apply them to your printer settings. Also, pay attention to some particular factors, such as:
The distance between each layer
The exposure time for both the bottom layers and the normal ones
Lift speed and patterns
Anti-aliasing settings
Slice and Export
Once you know you've done a great job in editing settings. Slice the calibration file and save it to a format which is compatible with your Saturn 4 Ultra. The most common format will be a .ctb file.
Print the Calibration File
Take the file you just created and feed it into your printer. You can now start the printing process. Remember to make use of the correct resin and see to it that you stir the resin well before printing.
Evaluate the Results
Take out the print from the plate and clean it properly even after the printing is finished. Then judge different aspects and patterns on the calibration print, for example:
The print should have well-defined edges and details
Look for proper support attachment
Check for a looser print that still is accurate in its dimensionality
Fug by eye sight
Fine-tune Settings
Based on your visual comparison, do some alterations to your prints. This might need:
Adjusting the exposure time in small increments, increasing or decreasing those times
Fine-tuning lift rates
Use of different types of support settings
Turn the anti-aliasing control into many other states try all of them find that the max one clears the mishap
Repeat if Necessary
If you have made significant changes to your settings, it is important to run the calibration file again to check if the changes are good. This loop has to be run until you get the results you want.
Save Your Optimal Settings
For now, to save the present calibration settings for the calibration file, keep them as the profile in your slicing software. In this way, the next time, you can simply use such settings to get the optimal performance from the printer.
Advanced Calibration Techniques
Resin-Specific Calibration
Various resins subtly change the settings needed. If you print with different types of resins regularly, then you would be better off creating separate profiles for each type of resin. By doing so, you ensure the best results with differing materials.
Environmental Considerations
Air and other conditions factoring in like temperature and humidity can also make changes in the quality of a print not always be immediately observable. Time mind environmental factors in the calibration process and adjust settings accordingly. If there are significant changes in the printing place, you would better re-calibrate sometimes.
Regular Maintenance and Calibration
Keep on diagnosing your printer by sending the calibration file to it and then print one or more known files on a weekly - bimonthly pattern, more often when you suspect changes. It is wise to do this after the machine has passed some time or after it has been maintained.
Troubleshooting Common Calibration Issues
Over-Exposure
If your calibration print reveals issues suggesting that there is over-exposure such as only the broadest surfaces with lumps, the windows into the cross-sections have gone hazy and have become very thick, then it's better to start with decreasing the bottom layer exposure time and every next layer by 0.5 seconds. Then you can verify what you've done by doing the calibration print again.
Under-Exposure
Under-exposure, prints usually appear with hanging features and poorly supported sections. In such a situation increase the exposure time for normal layers gradually. after that look for the most suitable time and use it to re-print a calibration file with this time.
Layer Separation
If there's a sliced part of the print, changing the height that the printed layers will rise on Is the first one (lift settings are to change), also sometimes the algorithm might haven't received the proper instructions so a second among other possibilities is to lower the lifting a.k.a. peel speed to 0. Whether or not suction forces that will pull the layers apart during printing are the same or less can be checked without printing another one.
Poor Surface Finish
Issues with the surface may stem from anti-aliasing settings that are not correctly set in the slicing software. Another cause is the damaged and/or improperly installed FEP film. Improving these settings will lead to improved surface smoothness.
Leveraging Calibration for Advanced Printing Techniques
Hollow Prints
Once you get the necessary calibration that will serve as a starting point you might look for a more advanced one which would be to do the hollow prints. The Saturn 4 Ultra calibration file not only helps you to identify the satisfactory settings but also tell you the suitable wall thickness and drain hole size to support your printer in making a hollow print which will be successful.
Support Optimization
Take a look at the testing report generated by the calibration trial and use it to manage your strategies on how to place and what types of supports the printer will so with better settings. Being able to see the final output relies on the, mainly vision data, the software uses to determine the final tipping instruction. This way you can create the most efficient and easily dusting supports out of the models.
Multi-Part Prints
In connection to the Saturn 4 Ultra calibration file, those are the elements that contribute to the fact that multi-part models can or cannot achieve the final goal. Hence if you want to print these parts then you must be accurate that they will end up suitably joined. This refers to the correct execution of the calibration process.
The Impact of Proper Calibration on Print Quality
It is reported that after you calibrate your Saturn 4 Ultra production, it ends up being the best. Some of the advancements realized over calibration may include:
Certificate of all your print is not good but also the printers get more productivity
Less money you give for the materials
Less energy usage meaning the 3D prints you get can be more complex
Fewer hassles, you will demonstrate continued prints
Rise in the lifetime of your printer components
Through the Saturn 4 Ultra calibration file exploration, you become a different person who can use their printer with success. The new 3D prints you have are the outcomes of the hard work done by the calibration file and your practice in the whole printing process. You can come back to this file one time to initiate some tough issues or many times to find out the strength where these issues are.
Conclusion
The Saturn 4 Ultra calibration file functions as an indispensable tool in attaining supreme prints. Adoption of the steps significantly prophylaxes that the typical printing issue may be faced by consumers. If users can allow themselves to the printable alien, this can only be a powerful visual manifestation. Calibration, in my view, is a unique one-time procedure only that will turn your skill from figurative to absolute and will allow you to do 3D printing responsibly. As we all undergoe learning the calibration a few times can have some sustaining costs, the photoresist (a substance causing, stopping, or directly forming the film that is then being developed) is one of them and it only needs replacing after a certain number of abuses.
I ask you for the sake of your satisfaction, get down the process of calibration and lean on its ready availability for making the whole 3D process an efficient one without any doubt. If you persist in your efforts to use all the available potential, I assure you that you will, in the near future, gain the most from the Elegoo project.
Recommended for you
Technetify is your go-to destination for the latest insights and trends in technology. Our blog offers a diverse range of articles that cater to tech enthusiasts, professionals, and casual readers alike.
Follow Us
Engage
© 2024. All rights reserved Technetify.com
Guest post